Tutorials
Install and open your first map
Install Visual Backlog from the Atlassian Marketplace, open it in a Jira space, and learn where everything is on the screen.
In this tutorial you install Visual Backlog, open the map of one of your spaces, and move around it. It takes about five minutes. You need a Jira Cloud site; to install the app you need to be an administrator of that site.
1. Install the app
- Open Visual Backlog on the Atlassian Marketplace.
- Use the button on the listing to add the app.
- Pick your Jira Cloud site and confirm.
Visual Backlog is free for up to 10 users. See Pricing and limits.
2. Open the map
- In Jira, open a space that has some work items in it.
- In the space’s menu, choose Visual Backlog.
The map of that space is drawn. A space with more than 150 work items opens folded to its epics the first time, so it is readable straight away. You will learn to fold and unfold in Fold a space to its epics.
3. Find your way around the screen
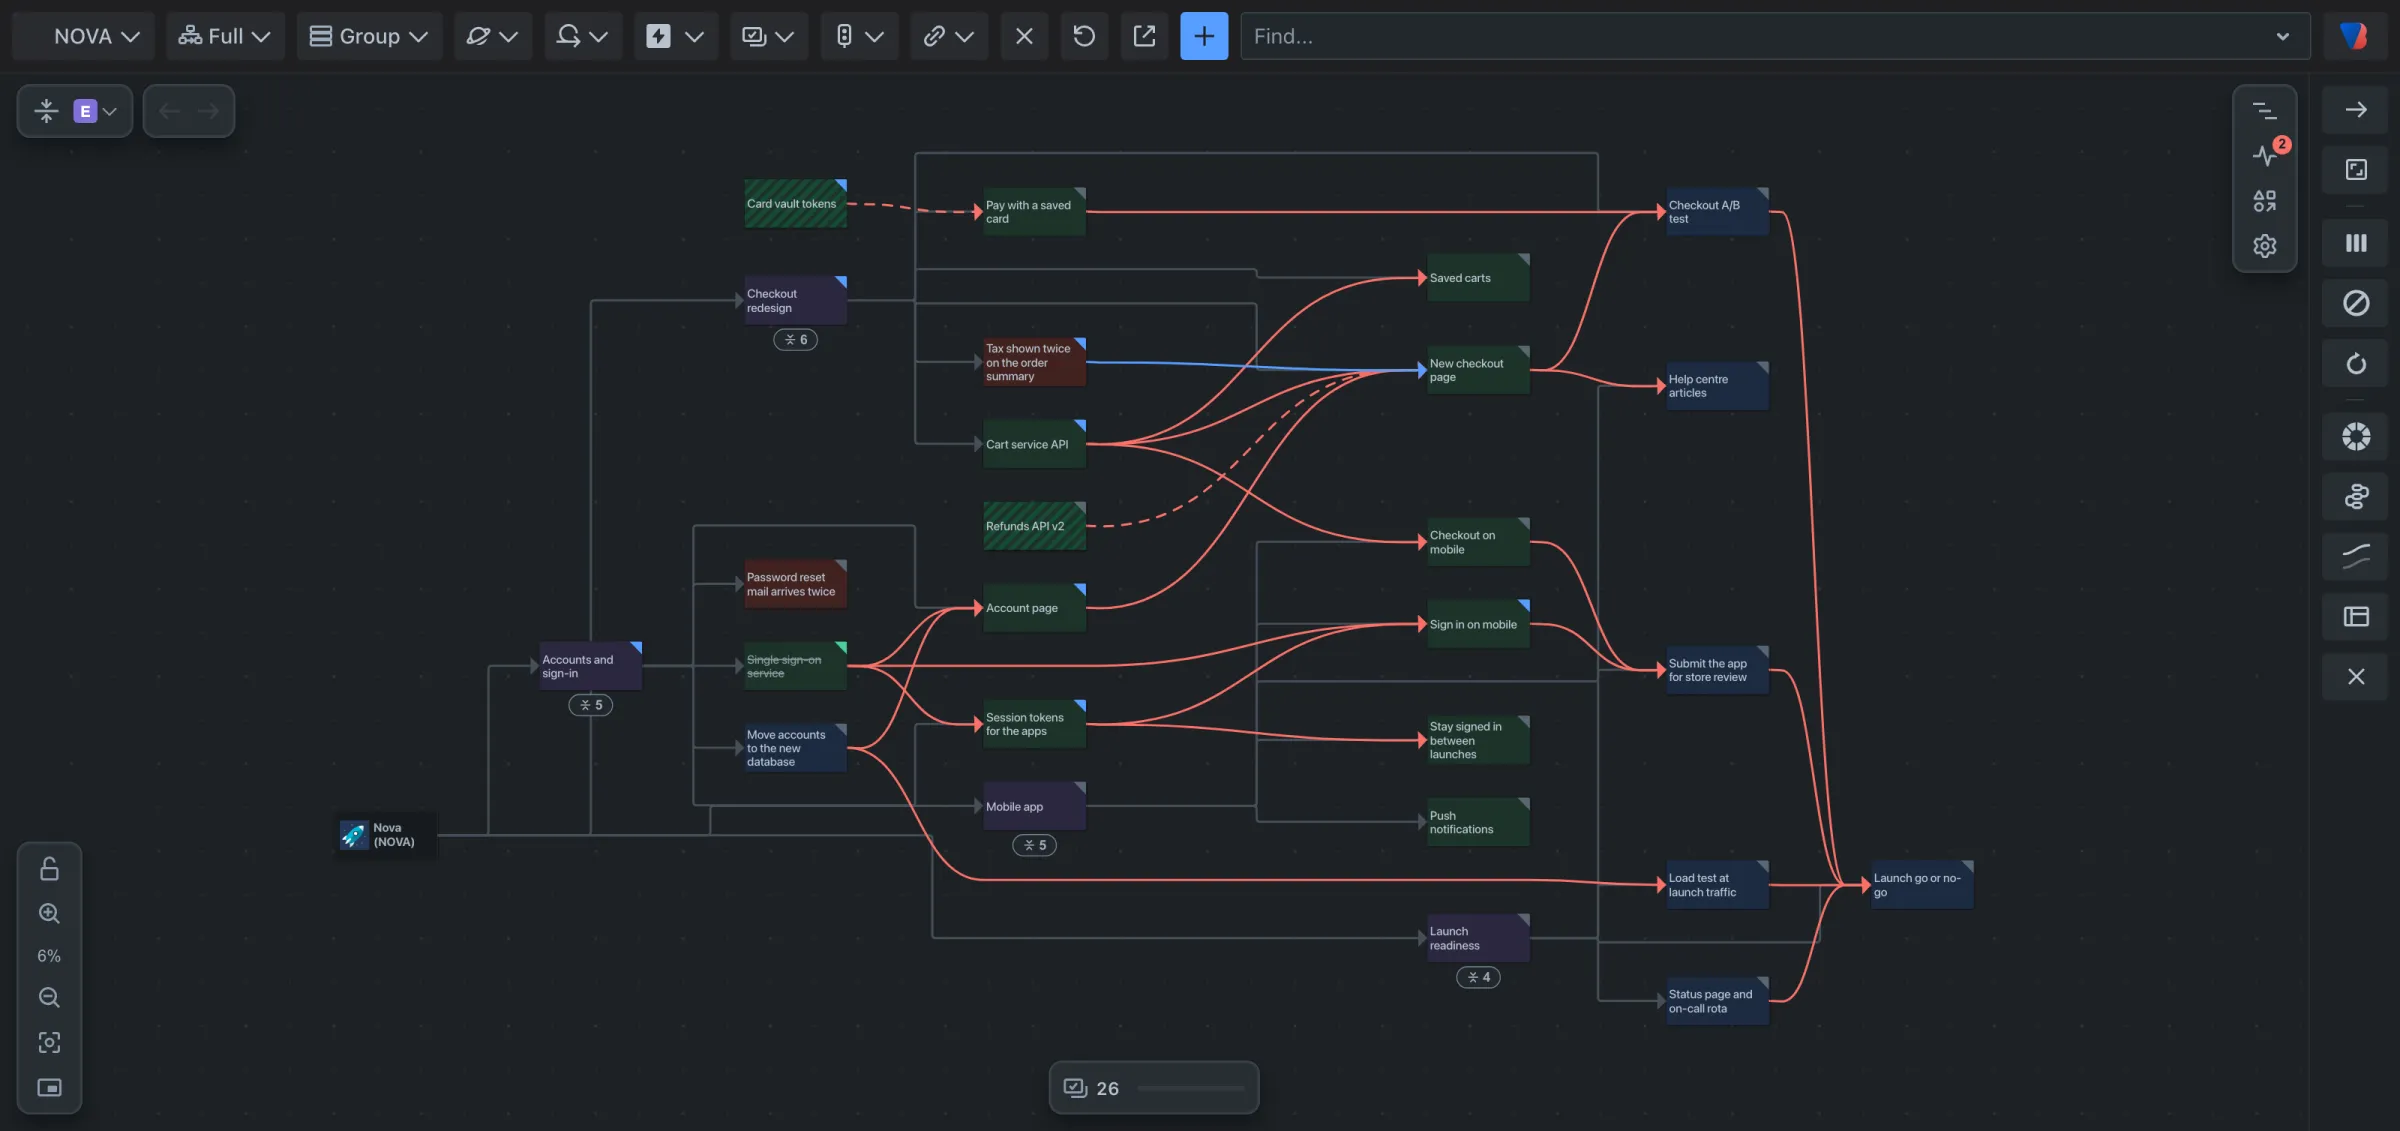
- Along the top: the toolbar. From the left: where the map’s work comes from (it shows the space’s key, here NOVA), the mode (Full), Group, the filters, and Find…. Every control is described in the toolbar reference.
- Top left of the map: the fold button, and the Back and Forward arrows.
- Bottom left: the zoom controls.
- Bottom middle: how many work items are on the map.
- Right of the map: four icons that open the panels: Navigator, Backlog health, Legend and Settings.
- Far right: the layout settings, a column of buttons that change how the map is drawn.
4. Move around
- Scroll to move the map up and down. On a trackpad, slide two fingers in any direction.
- Drag an empty spot of the map to move it.
- Hold Ctrl (Cmd on a Mac) and scroll to zoom. On a trackpad, pinch.
- Click Fit to view in the zoom controls at the bottom left to see the whole map again.
As you zoom in, cards show more: the work item’s key, its status, who it is assigned to and its story points. As you zoom out, they simplify.
5. Look at one work item
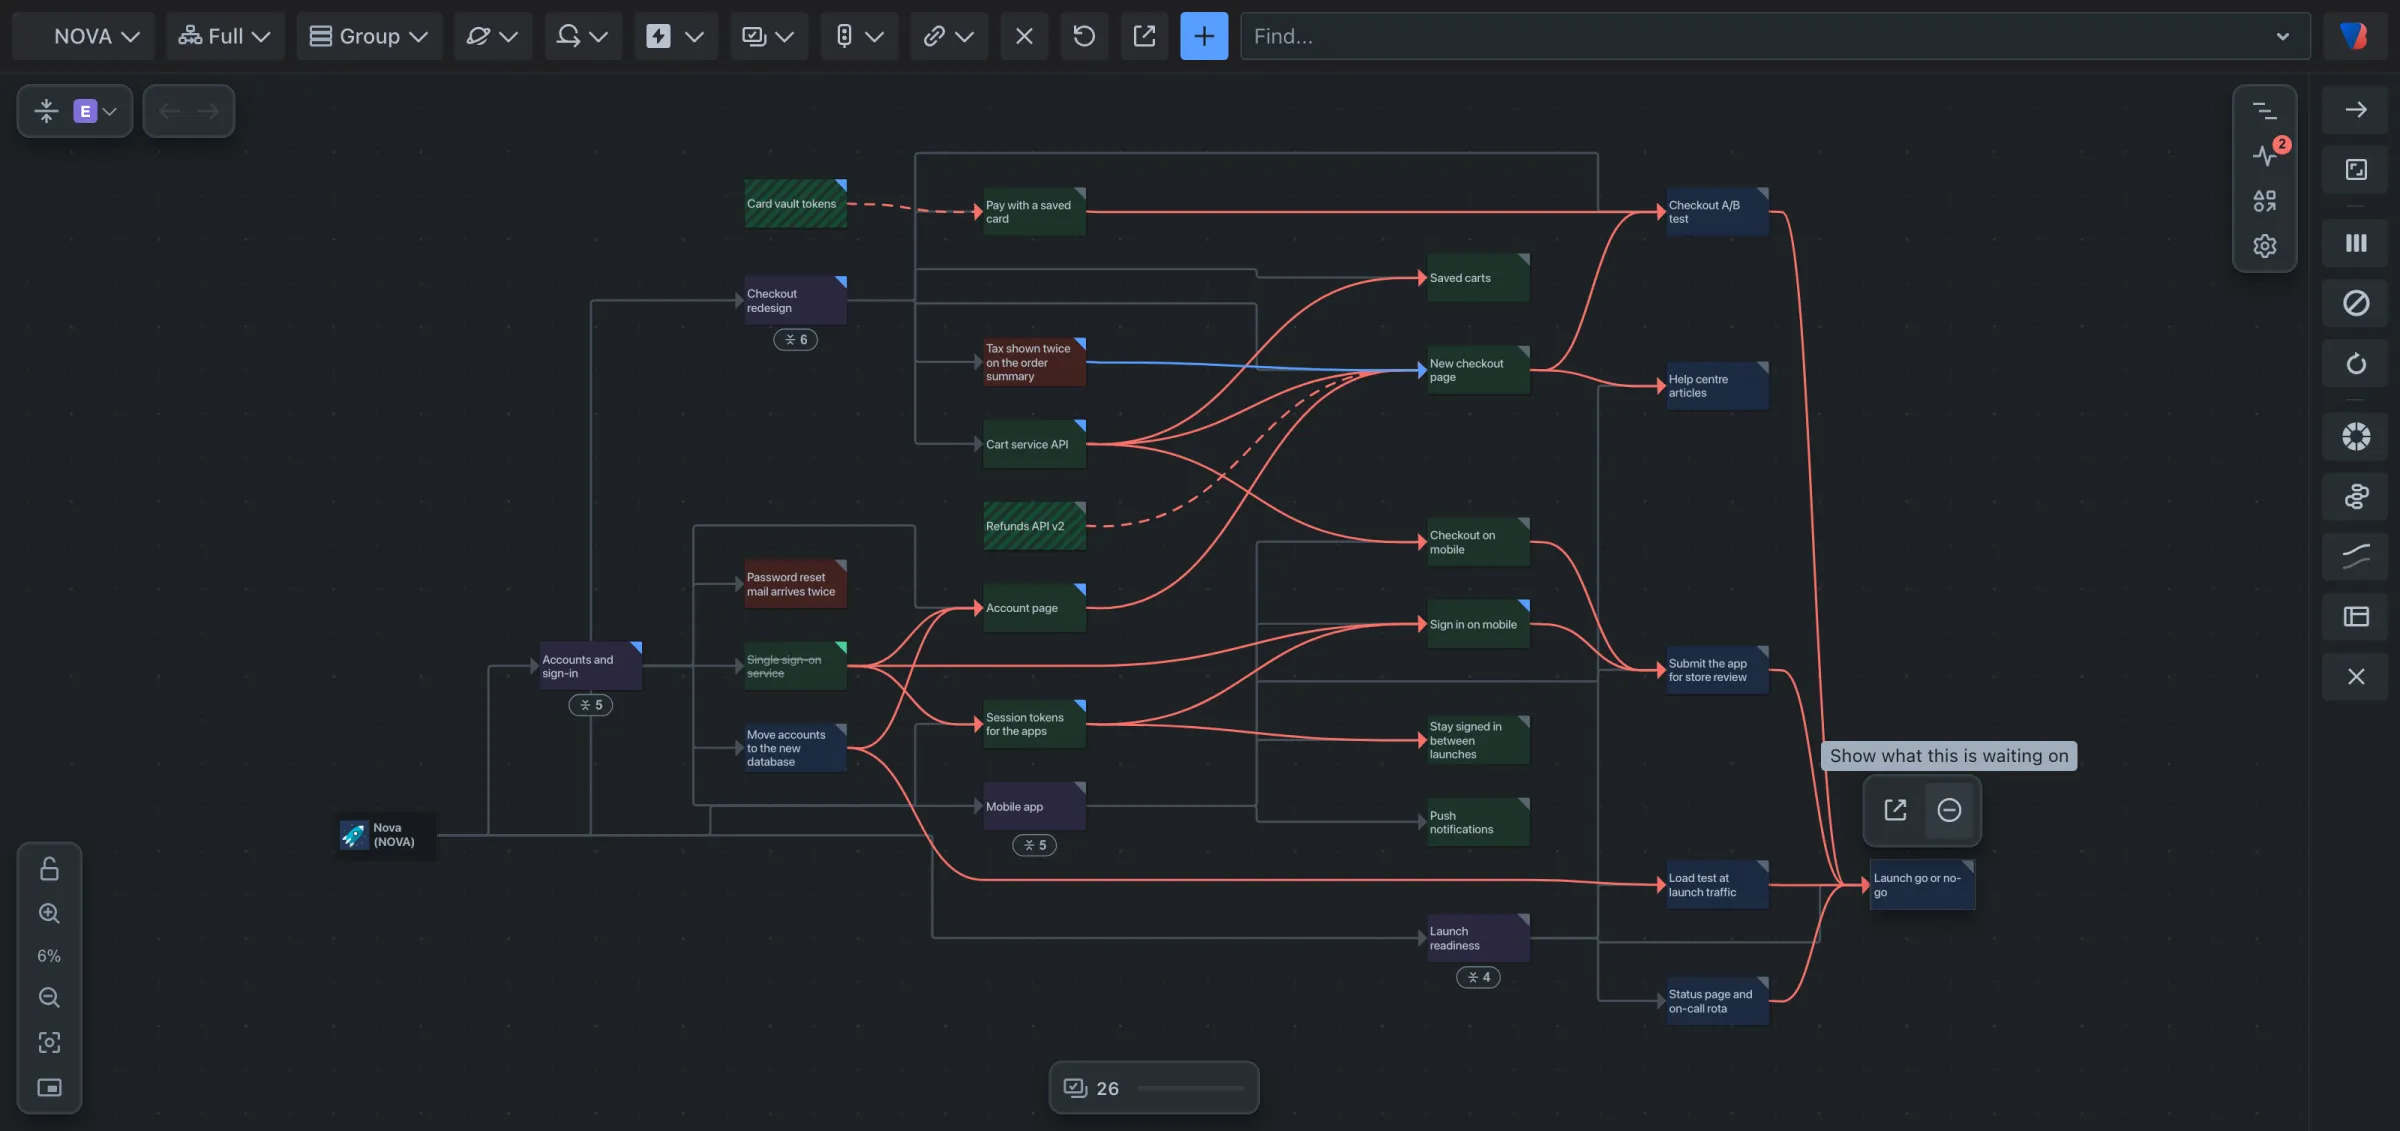
- Click a card. Two or more icons appear above it.
- Point at each icon to read what it does. The first opens the work item in Jira.
6. Find a work item by name
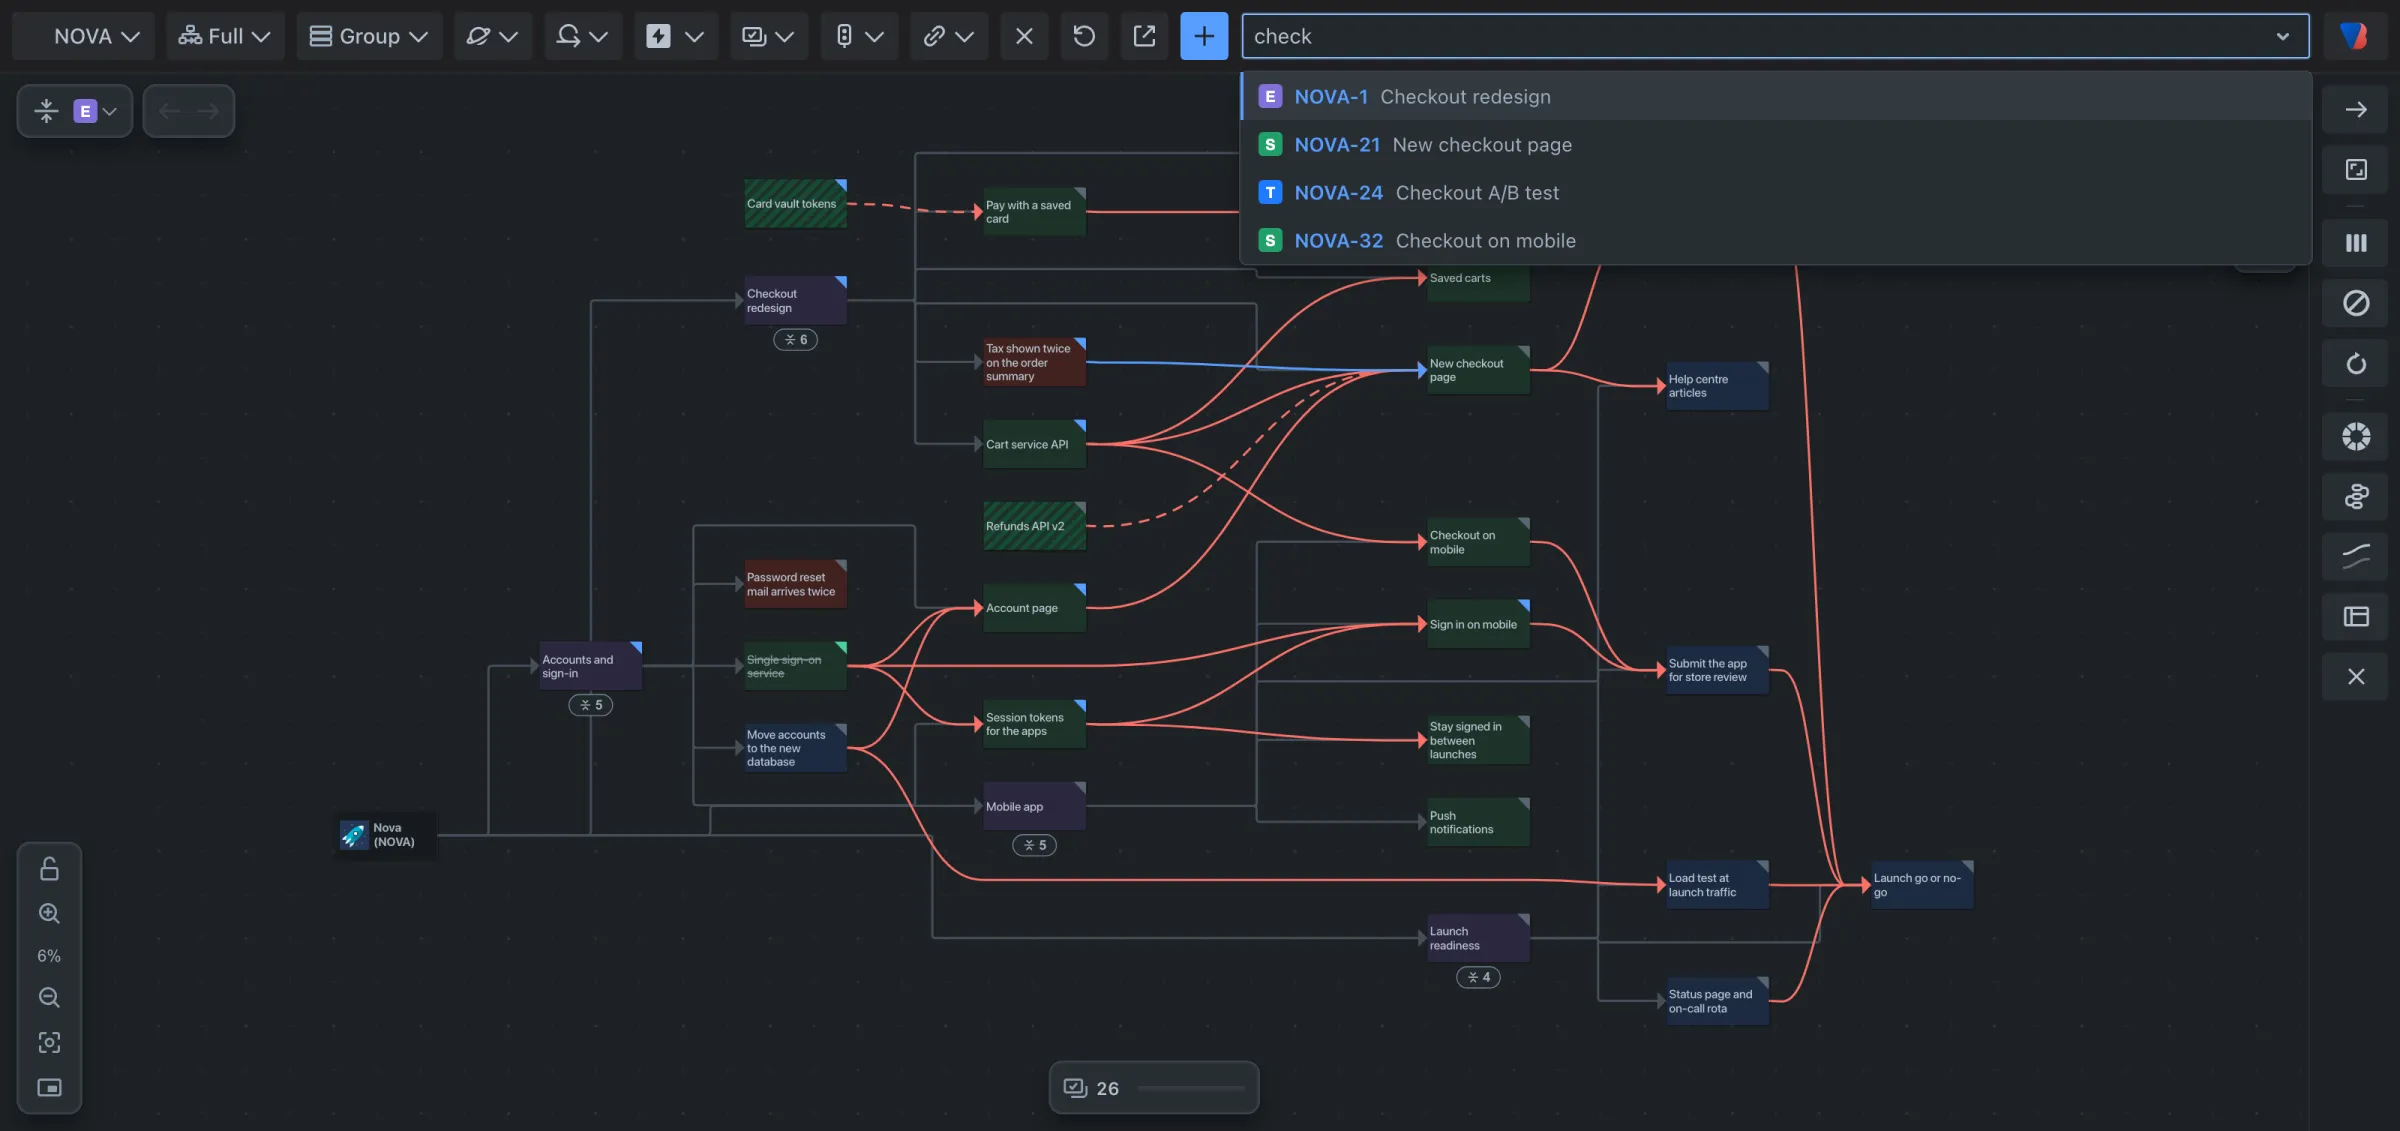
- Click Find… in the toolbar.
- Type part of a work item’s title or key.
- Pick it from the list. The map moves to that card.
What you have learned
You installed the app, opened a map, and know where the controls are. Next: Read the map.